
Product Overview
Enterprise Architecture
The OpenLink ODBC to JDBC Bridge implements a multi-tier architecture that enables seamless interoperability between ODBC-compliant clients and JDBC data sources:
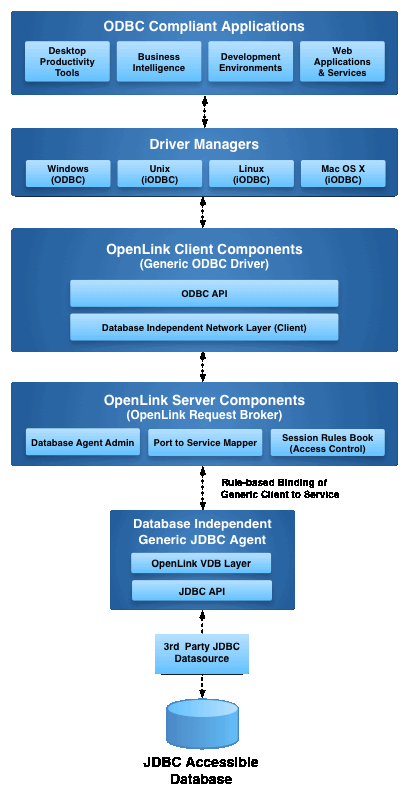
Figure 1: Multi-tier ODBC-JDBC Bridge Architecture
Value Proposition
The OpenLink ODBC to JDBC Bridge Connector solves three fundamental enterprise connectivity challenges:
Enables ODBC-compliant applications running on Windows to connect seamlessly to databases and data platforms that are only accessible via JDBC drivers or provide superior connectivity through JDBC—eliminating data silos and expanding application reach without costly rewrites.
Removes the operational burden of configuring ODBC Data Source Names (DSNs) on individual client machines. Configuration is centralized and managed server-side, dramatically reducing deployment complexity and maintenance overhead across enterprises.
Provides powerful attribute-based access control (ABAC) integrated into every ODBC session. Access policies can be informed by user identity, client application, network address/range, target DBMS, and other contextual attributes—enabling granular security without application changes.
Primary Solution
The OpenLink ODBC to JDBC Bridge Connector enables ODBC-compliant applications (including BI tools, spreadsheets, and custom applications) to access data from databases that only provide JDBC drivers—such as modern big data platforms, NoSQL databases, and various Java-based systems.
Deployment Architecture
This client-side, multi-tier driver installs on a Windows machine (Personal or Application Server) and acts as a client to a remote database server. The bridge intelligently translates ODBC calls from the client application into JDBC calls that the target database understands, providing seamless interoperability between disparate technologies.
Ready to Get Started?
Discover the complete OpenLink Enterprise JDBC to ODBC Bridge Connector solution and explore all available features, documentation, and support resources.
Learn More About Enterprise JDBC to ODBC Bridge →Installation Guide
Follow these four steps to install the OpenLink ODBC to JDBC Bridge Connector on your Windows system.
Java Environment Setup & JDBC Testing
Before configuring ODBC DSNs, verify that your JDBC drivers are properly installed and accessible. This section guides you through environment setup and provides a Java utility to test JDBC driver connectivity.
Step 1: Locate JDBC Driver JAR Files
Determine the location of the JAR files for each JDBC driver you plan to use. Ideally, place all JDBC driver JARs in a common directory for easier management.
C:\Program Files\JDBC\
├── postgresql-42.7.jar
├── mysql-connector-java-8.0.jar
├── ojdbc8.jar
└── other-jdbc-drivers.jar
C:\Program Files\Java\C:\Program Files\JDBC\- Application-specific directories
Step 2: Set CLASSPATH Environment Variable
Ensure the CLASSPATH operating system environment variable includes entries for each JDBC driver JAR file location.
- Press
Win + Xand select System - Click Advanced system settings
- Click Environment Variables
- Under System variables, click New
- Variable name:
CLASSPATH - Variable value:
C:\Program Files\JDBC\*(or your driver directory) - Click OK and close dialogs
- Restart any open command terminals for changes to take effect
Step 3: Create and Run UniversalJDBCTest
Save the following Java source code as UniversalJDBCTest.java. This utility discovers installed JDBC drivers and tests their connectivity interactively.
import java.sql.Connection;
import java.sql.DatabaseMetaData;
import java.sql.DriverManager;
import java.sql.SQLException;
import java.sql.Driver;
import java.util.Enumeration;
import java.util.ArrayList;
import java.util.List;
import java.util.Scanner;
import java.io.Console;

public class UniversalJDBCTest {

    public static void main(String[] args) {
        Scanner scanner = new Scanner(System.in);
        Console console = System.console();

        System.out.println("=== Universal JDBC Connection Test ===\n");

        // Collect registered JDBC drivers
        List<Driver> driverList = new ArrayList<>();
        Enumeration<Driver> drivers = DriverManager.getDrivers();
        System.out.println("Available JDBC Drivers:\n");

        int index = 1;
        while (drivers.hasMoreElements()) {
            Driver driver = drivers.nextElement();
            driverList.add(driver);
            System.out.printf("%d) %s (v%d.%d)\n",
                    index++, driver.getClass().getName(),
                    driver.getMajorVersion(), driver.getMinorVersion());
        }

        if (driverList.isEmpty()) {
            System.out.println("⚠️ No JDBC drivers are registered with DriverManager.");
            System.out.println("Make sure your driver JARs are on the classpath.\n");
            scanner.close();
            return;
        }

        System.out.print("\nEnter driver number to test: ");
        int driverChoice = scanner.nextInt();
        scanner.nextLine();

        if (driverChoice < 1 || driverChoice > driverList.size()) {
            System.out.println("Invalid driver selection.");
            scanner.close();
            return;
        }

        Driver selectedDriver = driverList.get(driverChoice - 1);
        System.out.println("\nTesting " + selectedDriver.getClass().getName() + "...\n");

        System.out.print("Enter JDBC URL: ");
        String url = scanner.nextLine();

        System.out.print("Enter username: ");
        String user = scanner.nextLine();

        System.out.print("Enter password: ");
        String password = scanner.nextLine();

        try {
            System.out.println("\n⏳ Attempting connection...");
            Connection conn = DriverManager.getConnection(url, user, password);
            System.out.println("✓ Connection successful!\n");

            DatabaseMetaData metadata = conn.getMetaData();
            System.out.println("Database Information:");
            System.out.println("  Database Name: " + metadata.getDatabaseProductName());
            System.out.println("  Version: " + metadata.getDatabaseProductVersion());
            System.out.println("  URL: " + metadata.getURL());
            System.out.println("  Username: " + metadata.getUserName());

            conn.close();
            System.out.println("\n✓ Test completed successfully.");

        } catch (SQLException e) {
            System.err.println("\n❌ SQL Error: " + e.getMessage());
            e.printStackTrace();
        } finally {
            scanner.close();
        }
    }
}
- Compile:
javac UniversalJDBCTest.java - Run:
java -cp "C:\Program Files\JDBC\*" UniversalJDBCTest - Follow the interactive prompts to test your JDBC drivers
Step 4: Verify Test Results
The utility will display:
- ✓ Success: Database connection established with metadata display
- ⚠️ No drivers: CLASSPATH needs adjustment or drivers are missing
- ❌ Connection error: Check URL format, credentials, and database accessibility
Configuration Guide
Once installed and your Java environment is verified, configure your Data Source Names (DSNs) and test the connection using these steps.
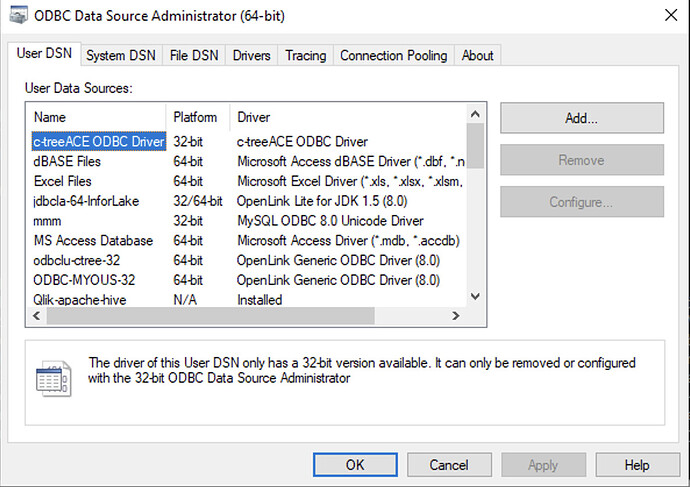
Figure 2: ODBC Data Source Administrator
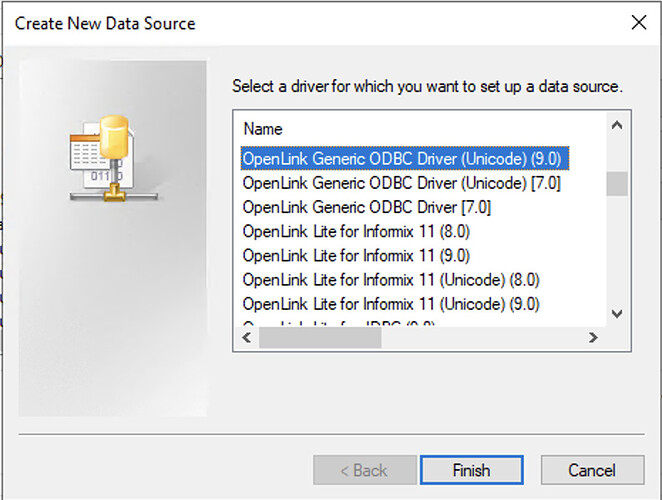
Figure 3: Select OpenLink Generic ODBC Driver
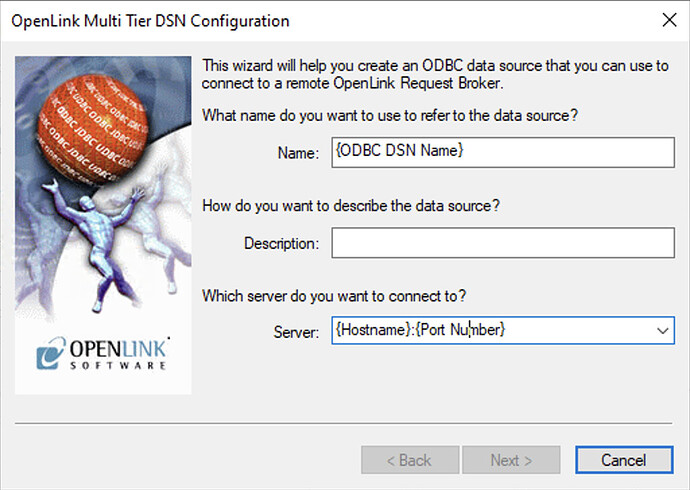
Figure 4: Enter DSN Name and Hostname:Port
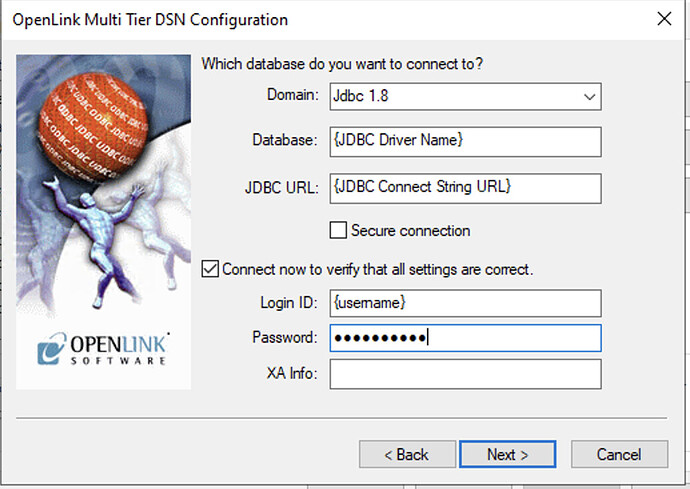
Figure 5: Configure JDBC Domain, Driver, URL, and Credentials
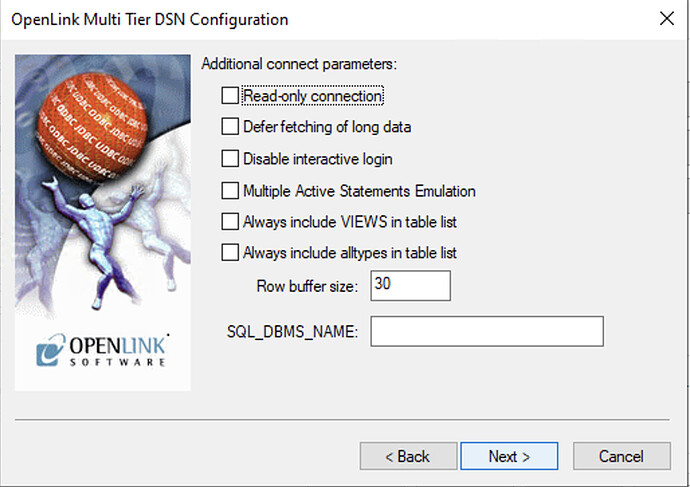
Figure 6: Additional Options (Default Settings)

Figure 7: DSN Configuration Summary and Test Data Source Button

Figure 8: Successful DSN Connection Confirmation
Using the C++ Demo Application
The C++ Demo sample application is included with the OpenLink installation and provides an interactive interface to test ODBC connections and execute SQL queries against your JDBC data source.
Figure 9: C++ Demo Application
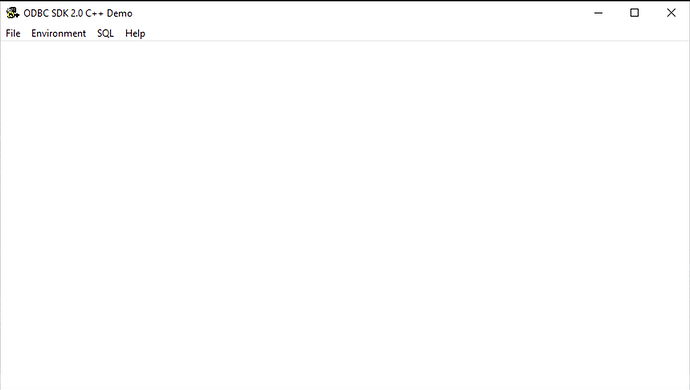
Figure 10: Environment → Open Connection Menu
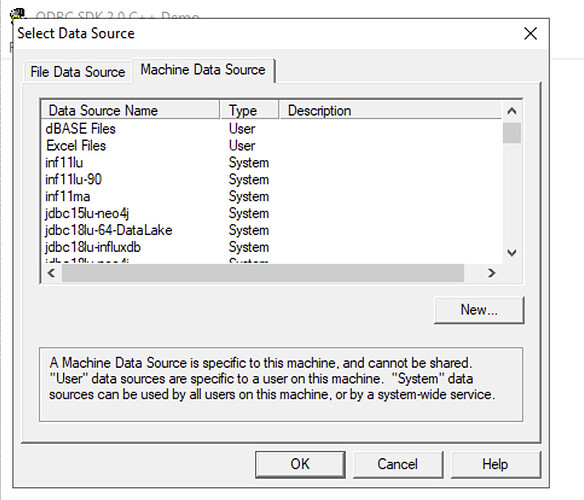
Figure 11: Select ODBC DSN for Connection

Figure 12: Enter Username and Password for Target Database
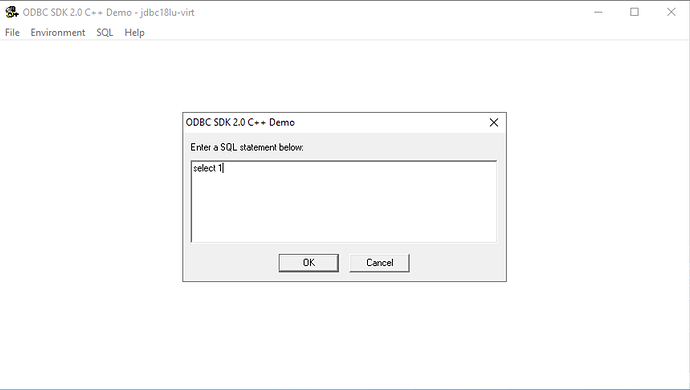
Figure 13: SQL → Execute SQL Menu

Figure 14: Query Results Display
Testing & Troubleshooting
Connection Test Verification
The C++ Demo application provides a straightforward method to verify that all components of the ODBC-to-JDBC Bridge are working correctly:
- ✓ Successful: Query executes and returns expected results
- ⚠️ DSN Not Found: Verify DSN exists in ODBC Administrator
- ❌ Authentication Failed: Check username/password and database credentials
- ❌ No Connection: Verify JDBC driver is installed and CLASSPATH is set correctly
Common Troubleshooting Steps
- CLASSPATH Issues: Ensure JDBC driver JAR files are accessible via CLASSPATH environment variable
- JVM Not Found: Verify 64-bit JVM is installed and jvm.dll path is correct in system environment
- License Errors: Check that license files (oplrqb.lic, jdbc.lic) are in {OPENLINK_INSTALL}/bin directory
- Port Conflicts: Verify the Request Broker port (default 5000) is not in use by another service
- Database Connectivity: Test JDBC driver independently to verify it can connect to your target database
Additional Resources
Glossary
Key terms and concepts used throughout the OpenLink ODBC to JDBC Bridge documentation: